
“For time and the world do not stand still. Change is the law of life. And those who look only to the past or the present are certain to miss the future.” – John F Kennedy
I’ve been thinking a lot about change recently. About the ever shrinking gap between B2B and B2C. About what that means for us at CV, and you as CV customers.
A long, long time ago in a galaxy not so far away (see what I did there?) B2B customers would expect a certain look and feel. They didn’t expect things to change often – beyond a new product range every year or so (though the exact timing would depend on your market).
Nowadays it’s a completely different game. B2B customers expect just as much innovation as their B2C counterparts. As humans, we’re enamoured with all things shiny and new.
So how can you give your content a new lick of paint? With our handy Layout Creator, of course! This tool lets you make style changes simply and easily, breathing new life into old pages, and customising the look and feel of your site.
To demonstrate, I’ve created a new custom page. My new page is going to have multiple widgets on it. By default when you create a new custom page it will look like this:

BUT it doesn’t have to stay looking like that.
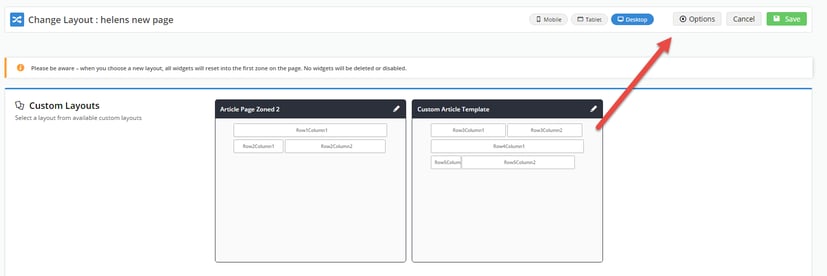
Click this ‘Change’ button right here and enter a world of pure imagination (I couldn’t resist at least one Willy Wonka reference):

You’ll notice we give you a bunch of different layout options off the bat, but don’t worry if none of them suit.
Hit that little Options button up the top right, select ‘Add Custom Layout’, and get ready to let your creative side fly.
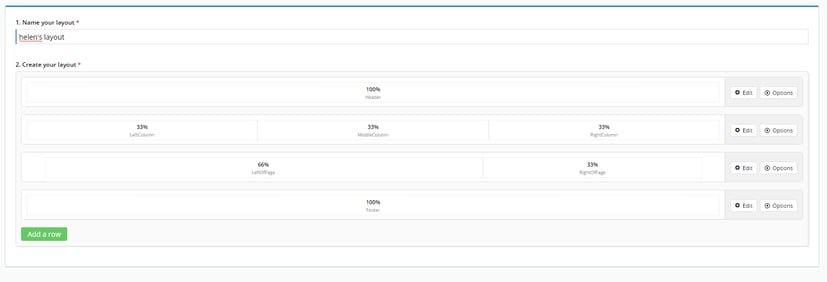
Here’s where you design the template that your new page is going to use.
So an example could look something like this:
Some quick tips worth noting:
- Your columns can’t exceed 100% width in each row (but they don’t HAVE to add up to 100%, either)
- By hitting the edit button you can choose whether any particular column should be padded or full width
- When changing an existing page to a new layout all widgets will move to the first row
- Don’t worry – you can move them back, but just be aware if you’re doing this on your live site it’s going to look a little messy if you don’t change the layout and update the widget locations at the same time.
And my favourite tip:
You can use these custom layouts in conjunction with things like roles. So, you could have a custom layout page that’s designed specifically for certain customers (for example, a separate information page specifically targeting your high value customers).
It’s all about the personalisation, baby!
If you’d like more in-depth information on creating custom layouts, you can check out the CV Connect article written by our very own documentation guru, Katie.
Well, I’ve finished my coffee, and hopefully you have too, so I’ll wrap this one up. Thanks so much for popping by!
If you have any questions/suggestions/just generally want to chat about layouts, feel free to leave me a note in the handy comment box below.
Until next time.