
Personalisation is important. Our recent blog post - Why Is Personalisation Important - uncovered some reasons as to why it should become part of your marketing arsenal. Today we will be diving into the “How To” of personalisation and run through some scenarios in the BPD CMS that you can set up on your own website today.
Who are your customers?
Effective personalisation relies on an appreciation of the goal behind it - to make your customer's life easier and save them time. Getting more revenue or reducing cost to serve might be a by-product of that goal, but it shouldn’t be the driving force. In order to save your customers time, you must first understand Who Are Your Customers? - because knowing what your customers want is the first step in offering it to them before they even go looking for it.
Set up basic personalisation
To start, I want to show you how to set up a basic “Layer” that allows us to target a subset of customers with a particular message or offer. For this example, I will be adding a banner for just my B2C customers who are more likely to purchase my Clearance odds and ends.
Step 1 - Define who will see the message
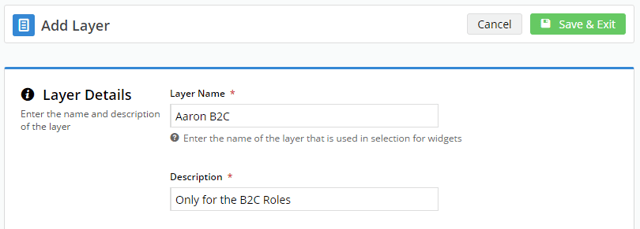
In the Layers section of the CMS (Advanced Content -> Layers) you have the ability to Add New Layer. Clicking this button takes you to a page where you can add a Name and Description (anything will do - just make it something that is clear to you), then define why or for whom a Layer will “activate”. You can use a single rule or a combination or all/any. The complexity of these rules is entirely up to you and I will explain each of them in further detail later in the article.
For now, I’m just going to select Public User and Self Registered Casual User in the Roles section of the page. This is essentially saying that the Layer will activate when a customer who belongs to one of those roles loads a page.
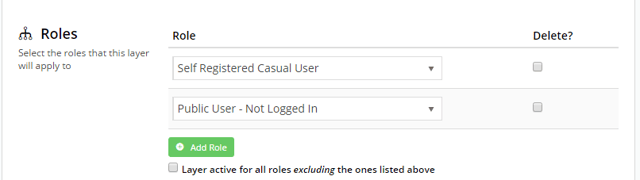
Hit Save and your Layer is now ready to use.
Step 2 - Add the Layer to a Widget
Now that we’ve got our Layer we can go and apply it to a particular widget. ANY widget in the CMS can have a custom layer applied to it so you can essentially customise any part of your website with layers and conditions.
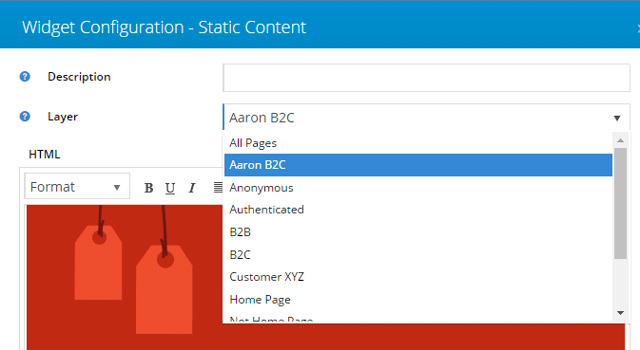
What I’m going to do to start is apply this new layer to a Static Content widget on the homepage. This Static Content widget will have a single image in it that is linking to my Clearance category. Select the Layer dropdown and you should see your newly created Layer. BPD ships with several Layers out of the box but you’re free to modify or remove any of the standard ones.
Step 3 - Admire your work
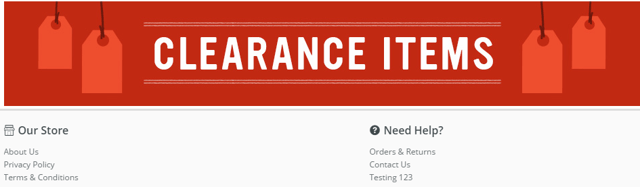
Now that we’ve set up our widget and applied our new Layer to it, the page should be working as intending instantly. I added my Widget to the bottom of my website here and it’s now showing for Public and Logged In B2C customers, but when I login as a B2B customer it doesn’t show.
What Other Personalisation Is Available?
The Layers configuration page has a large list of potential fields that can be used to activate a layer, with the majority of these fields integrated from your PRONTO ERP debtors. I will list each field and a short explanation of it.
URL Pattern
This allows you to activate a widget when the customer browses a particular page or pages.
If you wanted it to activate on any page for your Clearance category, you would put *clearance* in the field.
User Authenticated Status
You can define if this should be for Logged In (Authenticated), Logged Out (Anonymous) or Any customer.
Role
You can include (or exclude) any role from your Layer.
For more details on Roles please see this page: http://cvconnect.commercevision.com.au/display/KB/Standard+Roles
Account
You can define a single or list of debtors from PRONTO that should be included or excluded from this layer.
This allows some very specific Account Based Marketing techniques that are becoming very prevalent in the B2B Sales & Marketing space.
Bill-to Accounts
Like the above, this is an include or exclude list of Bill-to Accounts from PRONTO
Catalogues
For our clients using Custom Catalogues, this features allows you to activate a Layer based on what catalogue a customer is looking at. You can either set it up to run off the Global Catalogue, Any Custom Catalogue or Specific Custom Catalogues.
Customer Filters
There are several fields integrated from PRONTO ERP that can activate a Layer, they include:
- Industry Group Codes
- Marketing Flags
- Warehouses (i.e. the current customer's Warehouse)
- Rep Codes (i.e. the current customer's assigned rep code)
- Territories
- Customer Types
- Company Masks
- Industry Sub Groups
The Layering tool really allows you to target messages to the right customers so they’re informed.
- Got a rep going on Leave? Add a message to the Dashboard indicating that they're on Leave until X and they should contact XYZ if they need help.
- Warehouse backlog causing a 24 hour delay on orders? Add a message for the customers that are assigned to that warehouse and would be affected
- Got a good deal for a group of SKUs that a particular industry would be interested in? Target a sales message to them based on their Industry Group or Marketing Flag.
Now that you know where to start, go have fun! We would love to hear about any Layers you have created in the comments below.